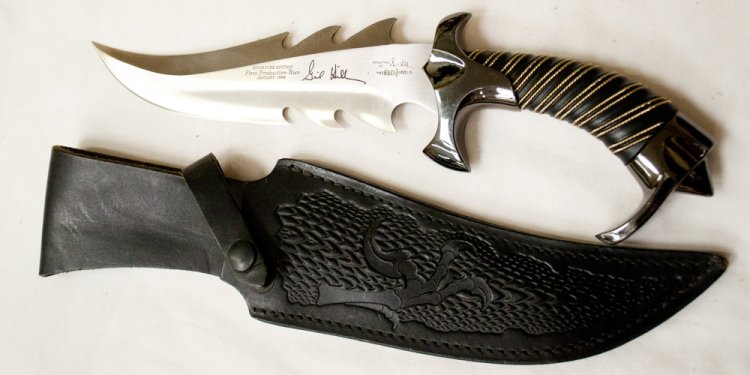
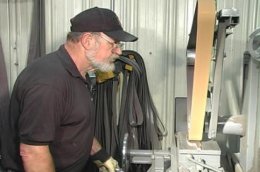
Gil Hibben
 Using a variety of the highest quality steel, Gil grinds each of his blades freehand, using no guides, jigs or automated equipment. His knife handles are handcrafted from a wide variety of materials including stag, ivory, rams horn, walrus tusk, micarta, and exotic natural woods such as Makassar ebony.
Gil regularly makes several popular designs that are in high demand among outdoorsmen and collectors. Other times, Gil expresses his creative side by making a truly new and different one-of-a-kind design. Gil also makes custom knives based on the designs of his customers.
Here is a brief overview of the knifemaking process for a fixed blade knife so you can appreciate the many hours of skilled craftsmanship that goes into a custom handmade knife.
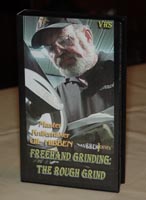
If you would like to see Gil Hibben demonstrate the whole blade grinding process
up to the point of heat treating, you can purchase Gil's video tape or DVD
of "The Rough Grind".
Many of the photos here are taken directly from the video.
Click HERE for more information about the video.
Notice: This is by no means a knifemaking tutorial. Knifemaking is inherently a dangerous process and should only be attempted by those with proper training. The purpose here is simply to give you an idea of the many steps involved in making custom knives.
The design is transferred on to a piece of steel with a scribe.
Using the scribed lines as a guide, the basic shape of the blade is cut on a metal cutting bandsaw.
At this stage, the steel is in the "annealed" stage. It is relatively soft and has a coating of scale and some surface pitting.
 Next, the blade is "profiled" using a disc grinder to smooth the edges and further refine the shape of the blade.
Now the blade goes to the surface grinder. This removes the surface scale and pitting and also insures that the sides of the blade are perfectly flat. The blade will be surface ground a second time with finer grit belts after heat treating. The blade is held in place by a magnetized table.
After surface grinding the blade has become magnetized from the magnetic table on the surface grinder. It must be demagnetized using an electronic demagnetizer or else the metal filings from the grinding process will stick to the blade.
Now we must scribe a center line on the blade which will show where the cutting edge should be when the blade is ground. Gil uses a special edge marking scribe that is adjusted according to the thickness of the steel he is marking.
Gil coats the blade with a special blue dye and then scribes the grind lines on the blade. He uses these lines as a guide during grinding.
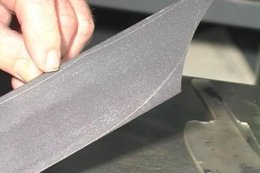
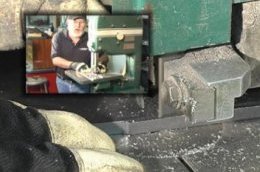
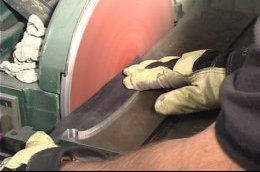
Now to the heart of knifemaking, grinding the blade. Gil grinds all of his blades freehand, without the aid of jigs or guides. It takes years of practice and experience to do this and achieve straight and even precision grinds freehand. Here, Gil is "hollow grinding" using a 137" x 2" belt grinder with a round contact wheel. This is the "rough grind". After heat treating the blade to harden it, Gil will grind it again with a succession of finer grit belts in the "final" grind.
Now the blade is ready for heat treating. Steel is hardened by heating it to a specific temperature for a specific amount of time and then quenching (cooling) it in a prescribed manner. Different types of steels must each be heat treated in a specific way. After heat treating, the blade is very hard and brittle. It must then be "draw tempered" in a lower temperature oven to give it some flexibility and bring to it's ideal Rockwell hardness. Proper heat treating is critical to making a good blade that is tough, durable and holds a good sharp edge. Improper heat treating can literally ruin a blade. Here, you see a red hot blade just after it was removed from the heat treating kiln.
After heat treating and tempering, the blade is surface ground a second time and then ground again with finer grit belts for the finish grind.
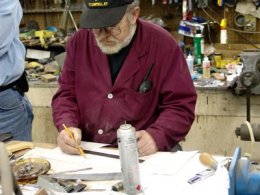
Gil prefers mirror polished blades. This not only provides a beautiful finish but it makes for smoother cutting and helps to keep the blade clean. Mirror polishing is a long, hard process using a series of buffers equipped with cloth buffing wheels coated with various grits of polishing compounds. Buffing takes a great deal of skill and attention as it is one of the most hazardous parts of knifemaking. Many knifemakers will not polish blades with buffing machines because it can be a very dangerous process. In the blink of an eye these buffers can yank the blade from your hand and throw it back at you at very high velocity. Here, we see Gil and one of his class students buffing their knives.
Now we finally have a finished blade but there is still a lot of work to do before we have a finished knife. The polished blade is covered with tape to protect it from scratches during the rest of the finishing process.
Now we have to make a guard and pommel. These pieces are typically milled from bars of brass, steel or nickel silver.
After the pieces are milled to shape and holes are cut where necessary, final fitting is adjusted by hand using files.
The guard is silver soldered or pressed onto the blade and the handle material is cut, drilled and shaped to the blade.
In this example, we show a hidden tang knife with a pommel where the tang of the knife goes through the center of a one-piece handle. The handle parts are cut, fitted and assembled using high strength epoxy to insure that everything is secure and watertight. If we were making a full tang knife with two-piece "slab" handles, also known as "scales", the handles would be attached to each side of the knife using brass or steel pins pressed through holes in the handles.
After the handle has set, it is ground to it's final shape using belt grinders and hand sanding.
The knife handles are polished on the buffing wheels.
Spacers made from sheets of brass, nickel silver or vulcanized and colored nylon are often used to make accent lines between the handle material and the blade, tang, guard or pommel.
On some knives, Gil embellishes the blade's spine and tang with decorative filework. This too is done by hand using fine files and chisels.
Share this article
Related Posts

Latest Posts